
AKASO Brave 4 Manual: A Comprehensive Guide
Welcome to the comprehensive guide for your AKASO Brave 4 action camera! This manual provides everything you need to unleash the full potential of your device. From initial setup to advanced features like 4K Ultra HD video recording and utilizing the AKASO GO app, we’ve got you covered. Dive in and start capturing amazing moments!
The AKASO Brave 4 is a versatile action camera designed to capture your adventures in stunning detail. With its 4K Ultra HD video resolution capabilities, gyroscope for stabilization, and various shooting modes, the Brave 4 is perfect for recording everything from extreme sports to family vacations. This user manual will guide you through the camera’s features and functionalities, ensuring you get the most out of your device.
Whether you’re a seasoned videographer or a first-time action camera user, the Brave 4 offers a user-friendly experience. Before diving into the specifics, it’s important to understand the camera’s basic operations and components. This section will provide a brief overview of what you can expect from the AKASO Brave 4 and how this manual can assist you in mastering its capabilities.
From understanding the various modes like video, photo, burst photo, time-lapse video, and timer photo, to navigating the camera settings and connecting to the AKASO GO app, this guide will provide step-by-step instructions. We’ll also cover essential topics such as formatting your microSD card, battery storage and operation, and troubleshooting common issues. Get ready to explore the world through the lens of your AKASO Brave 4!

What’s Included in the Box
Upon opening your AKASO Brave 4 box, you’ll find everything you need to get started on your action-packed adventures. The core component, of course, is the AKASO Brave 4 action camera itself. Make sure to handle it with care and familiarize yourself with its buttons and ports.
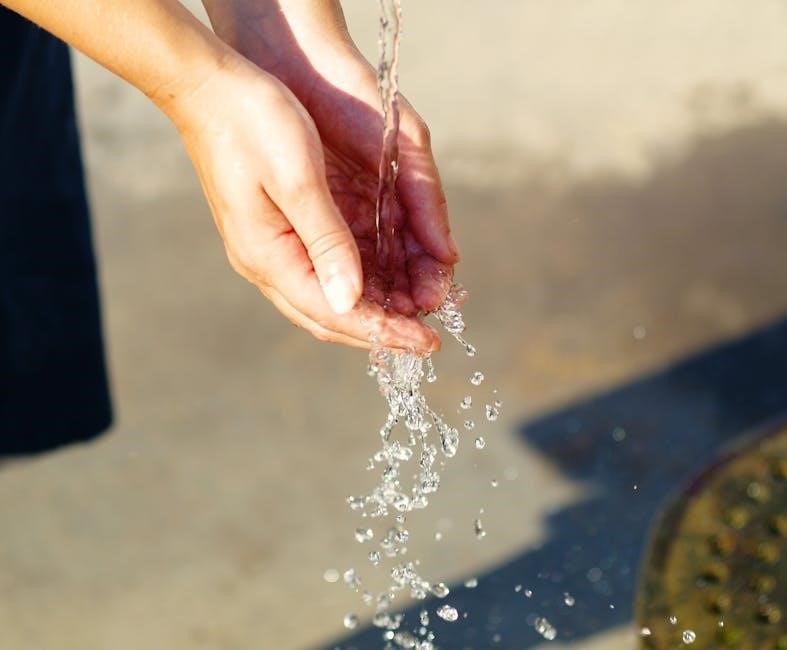
Alongside the camera, you’ll typically find a waterproof case. This crucial accessory allows you to submerge your Brave 4 in water, enabling underwater filming and protecting it from splashes and rain. A variety of mounts are also included, designed to attach your camera to helmets, bikes, and other surfaces. These mounts often come with adhesive pads for secure attachment.
You’ll also discover a battery, ensuring you can power up your camera right out of the box. A USB cable is provided for charging the battery and transferring files to your computer. Finally, don’t forget to check for the user manual (this guide!), which provides detailed instructions on operating your AKASO Brave 4. Ensure all these components are present before proceeding. If anything is missing, contact AKASO customer support for assistance. Enjoy exploring your new gear!
Getting Started with Your Brave 4
Now that you’ve unpacked your AKASO Brave 4, it’s time to get it ready for action! The first step is to insert a microSD card. The Brave 4 requires a microSD card (not included) to record videos and capture photos. Ensure you use a brand-name memory card that meets the camera’s specifications for optimal performance. Before using the card, it’s crucial to format it within the camera itself. This ensures compatibility and prevents potential errors.

Next, it’s time to charge the battery. Connect the camera to a power source using the provided USB cable. Allow the battery to fully charge before your first use. This will maximize its lifespan and ensure you have enough power for your adventures. While charging, familiarize yourself with the camera’s buttons and menu system.
Take some time to explore the different modes and settings. Understanding these options will allow you to capture the perfect shots and videos. Finally, consider downloading the AKASO GO app to remotely control your camera and easily transfer files to your smartphone or tablet. With these initial steps completed, you’re well on your way to capturing incredible moments with your AKASO Brave 4!
Powering On/Off the Camera
Mastering the power functions of your AKASO Brave 4 is fundamental for seamless operation. To power on your camera, locate the Mode button on the device. Press and hold this button for approximately three seconds. You’ll know the camera is powering on when you hear a beep and the status light illuminates. The display screen will also activate, showing the camera’s interface.
Conversely, to power off the Brave 4, repeat the same process. Press and hold the Mode button for about three seconds. The camera will emit a beep, and the status light will turn off, indicating that the device is shutting down. The display screen will also go dark.

It’s crucial to ensure the camera is completely powered off before storing it or removing the microSD card. This prevents potential data corruption or damage to the device. Additionally, be mindful of the battery level. If the battery is critically low, the camera may not power on. In such cases, connect the camera to a power source to recharge the battery before attempting to power it on again. Consistent and correct powering on and off will help maintain the longevity of your AKASO Brave 4.
Understanding the Different Modes: Video, Photo, Burst Photo, Time Lapse Video, Timer Photo, and Wifi
The AKASO Brave 4 offers a variety of modes to capture your adventures. The Video mode allows you to record high-definition footage, perfect for action shots or scenic landscapes. Switch to Photo mode for capturing still images with clarity and detail. For fast-paced action, use Burst Photo mode to take a rapid sequence of photos, ensuring you don’t miss a moment.
Time Lapse Video mode condenses long periods into short, engaging clips, ideal for sunsets or cloud movements. The Timer Photo mode lets you set a delay before the camera takes a picture, giving you time to join the frame. Finally, the Wifi mode enables you to connect your camera to the AKASO GO app on your smartphone or tablet.
By using the app, you can remotely control the camera, preview footage, and download your files. Each mode caters to different shooting scenarios, providing versatility and creative freedom. Experiment with each mode to discover the best way to capture your unique perspective. Understanding these modes is key to maximizing the potential of your AKASO Brave 4.
Navigating the Camera Settings
Effectively navigating the AKASO Brave 4’s settings is crucial for customizing your shooting experience. Access the settings menu by pressing the Down button or tapping the setting icon on the screen. Here, you’ll find options to adjust video resolution, photo quality, white balance, and ISO. Experiment with different resolutions to find the best balance between image quality and storage space. Adjusting white balance ensures accurate colors in various lighting conditions.
Within the settings, you can also configure features like loop recording, time-lapse intervals, and burst photo rates. The camera also allows you to set the date and time, ensuring your files are properly organized. Familiarize yourself with the different options and customize them to suit your specific needs. Proper setting configuration ensures that your Brave 4 performs optimally in any situation. Furthermore, explore the advanced settings for options like image stabilization and metering modes.
Understanding each setting empowers you to capture the best possible footage. Regular adjustments to settings ensure your camera adapts to changing shooting conditions. Don’t be afraid to experiment and discover the optimal settings for your unique style;
Formatting the MicroSD Card
Formatting your microSD card within the AKASO Brave 4 is a critical step for optimal performance and compatibility. Before you begin using a new card, or if you experience any issues with your current card, formatting it through the camera’s menu is highly recommended. Formatting erases all existing data on the card, so ensure you’ve backed up any important files first. To format, navigate to the settings menu on your Brave 4.
Within the settings, look for the “Format” option, typically represented by an icon or text label. Select this option and confirm your choice. The camera will then proceed to format the microSD card, preparing it for use with the Brave 4. This process ensures that the card’s file system is compatible with the camera, minimizing the risk of errors or data corruption. After formatting, the card will be ready to store your videos and photos seamlessly.
It’s important to note that formatting through the camera, rather than a computer, often yields the best results. Regular formatting helps maintain the card’s efficiency and prevents potential issues, leading to a smoother recording experience. Always back up your files before formatting!
Importance of Regular Formatting
Regularly formatting your microSD card in your AKASO Brave 4 is crucial for maintaining optimal performance and preventing potential issues. Over time, as you record videos and take photos, files can become fragmented, leading to slower read and write speeds. Formatting the card essentially cleans it up, organizing the file system and ensuring that the camera can efficiently store and retrieve data.
Think of it like decluttering your computer’s hard drive – regular formatting helps to keep things running smoothly. By formatting, you also reduce the risk of encountering errors such as corrupted files or recording interruptions. Formatting ensures the microSD card’s file system remains compatible with the AKASO Brave 4, preventing conflicts that could arise from using the card with different devices.
Before formatting, always back up any important photos and videos, as the process will erase all data. It’s a small price to pay for maintaining the long-term health and reliability of your microSD card, ensuring that you can continue capturing your adventures without any unexpected hiccups. A clean card results in clear videos!
Connecting to the AKASO GO App
Connecting your AKASO Brave 4 to the AKASO GO app unlocks a world of convenient features and enhanced control over your action camera. The app allows you to remotely control your camera, view a live preview of what the camera sees, and easily transfer photos and videos to your smartphone or tablet. To initiate the connection, first ensure your Brave 4 is powered on.
Next, activate the Wi-Fi function on your camera by pressing and holding the Wi-Fi button. This will enable the camera to broadcast a Wi-Fi signal. On your mobile device, open the Wi-Fi settings and search for the camera’s Wi-Fi network, which typically appears as “AKASO-Brave 4-C1-“. Connect to this network using the password provided in the camera’s manual or settings.
Once connected to the camera’s Wi-Fi, launch the AKASO GO app on your device. The app will automatically detect your camera, allowing you to access its controls and settings. From here, you can start recording videos, take photos, adjust camera parameters, and download your media files directly to your device for easy sharing and editing.
Step-by-Step Instructions for App Connection
Connecting your AKASO Brave 4 to the AKASO GO app is a straightforward process that enhances your camera’s functionality. Here’s a detailed, step-by-step guide to get you connected: First, power on your AKASO Brave 4 by pressing and holding the Mode button for approximately three seconds. Ensure that your camera has sufficient battery or is connected to a power source.
Next, activate the Wi-Fi function on your Brave 4. Locate the Wi-Fi button on your camera and press and hold it until the Wi-Fi icon appears on the camera’s display screen. This indicates that the camera is now broadcasting its Wi-Fi signal. Now, on your smartphone or tablet, navigate to the Wi-Fi settings menu.
Search for available Wi-Fi networks and locate the network name that corresponds to your AKASO Brave 4. It usually appears as “AKASO-Brave 4-C1-“. Select this network to initiate the connection. You might be prompted to enter a password; refer to your camera’s manual for the default Wi-Fi password. Once connected to the camera’s Wi-Fi network, open the AKASO GO app on your mobile device. The app should automatically detect your camera.
Understanding Camera Specifications: 4K Ultra HD Video Resolution
The AKASO Brave 4 boasts impressive video recording capabilities, primarily its 4K Ultra HD resolution. This specification refers to the level of detail and clarity captured in your videos. Specifically, 4K Ultra HD resolution translates to a video frame size of 3840 pixels horizontally and 2160 pixels vertically. This high pixel count results in incredibly sharp and detailed video footage, far surpassing the quality of standard HD or Full HD resolutions.
When recording in 4K Ultra HD, the AKASO Brave 4 captures significantly more information, allowing for greater flexibility in post-production editing. You can crop, zoom, and stabilize your footage without sacrificing image quality. While the Brave 4 supports 4K Ultra HD, it’s important to note the frame rate at which this resolution is recorded. The camera typically records 4K video at 24 frames per second (fps). This frame rate is ideal for cinematic-style videos, providing a smooth and film-like motion.
Understanding the 4K Ultra HD specification is crucial for optimizing your recording settings and achieving the desired visual outcome. Consider the lighting conditions and the intended use of your footage when selecting this resolution.
Battery Storage and Operation

Proper battery storage and operation are vital for maximizing the lifespan and performance of your AKASO Brave 4’s battery. When not in use, it’s recommended to store the battery in a cool, dry place, away from direct sunlight or extreme temperatures. High temperatures can degrade the battery’s chemical components, leading to reduced capacity and shorter run times. Similarly, very cold temperatures can temporarily diminish battery performance.

To optimize battery operation, avoid fully discharging the battery before recharging. Partial charging is generally better for lithium-ion batteries than consistently draining them completely. When charging, use the provided USB cable and a compatible power adapter. Avoid using damaged or incompatible chargers, as they can potentially harm the battery or the camera itself.
The AKASO Brave 4 also contains sensitive components, including the battery. During operation, avoid exposing your camera to very cold or very hot environments to prevent damage. Always ensure that the battery compartment is securely closed to prevent moisture or dust from entering. By following these guidelines, you can ensure reliable power and extend the overall life of your AKASO Brave 4 battery.
Mounting Your Camera
The AKASO Brave 4 offers versatile mounting options to capture your adventures from various perspectives. The camera comes with a range of accessories to facilitate secure attachment to different surfaces and equipment. Before mounting, ensure that the chosen mount is compatible with the Brave 4 and can withstand the intended use conditions, such as vibrations, impacts, or water exposure.
For activities like cycling or motorsports, handlebar mounts provide a stable platform for capturing dynamic footage. Helmet mounts are ideal for first-person perspectives, allowing you to record your point of view while keeping your hands free. Adhesive mounts can be used on flat or slightly curved surfaces, offering flexibility in placement on vehicles, surfboards, or other equipment.
When mounting the camera, double-check that all screws and fasteners are tightened securely to prevent the camera from dislodging during use. Consider using tethers or safety straps as a backup measure, especially in high-risk environments. Regularly inspect the mounts for wear and tear, replacing them as needed to maintain secure attachment and protect your AKASO Brave 4 from damage. Proper mounting ensures stable, high-quality footage and minimizes the risk of accidents.
Troubleshooting Common Issues
Encountering issues with your AKASO Brave 4 can be frustrating, but many problems have simple solutions. If your camera isn’t powering on, ensure the battery is properly charged and correctly installed. Try using a different USB cable and power adapter to rule out charging issues; If the camera freezes or becomes unresponsive, a soft reset by removing and reinserting the battery may resolve the problem.
Image and video quality issues can often be traced to incorrect settings or a faulty microSD card. Verify that you’re using a compatible, high-quality card and that it’s properly formatted within the camera. Experiment with different resolution and frame rate settings to optimize video quality for your specific needs. If you’re experiencing Wi-Fi connectivity problems, ensure that your smartphone or tablet is within range and that you’ve entered the correct password.

If these basic troubleshooting steps don’t resolve the issue, consult the complete PDF user manual for more in-depth guidance. You can also utilize the AI assistant for quick answers to common questions. Remember to keep your camera’s firmware updated to ensure optimal performance and compatibility. If problems persist, contact AKASO’s customer support for further assistance.
Accessing the Complete PDF User Manual
For a comprehensive understanding of your AKASO Brave 4 action camera, accessing the complete PDF user manual is essential. The PDF manual provides detailed explanations of every feature, setting, and function available on your device. It goes beyond the basic instructions, offering in-depth guidance on optimizing your camera for various shooting scenarios.
You can typically find the PDF user manual on the official AKASO website under the support or downloads section for the Brave 4 model. Alternatively, a quick online search for “AKASO Brave 4 user manual PDF” should lead you to a downloadable version. The PDF format allows you to easily search for specific topics, zoom in on diagrams, and print sections for offline reference.
Within the PDF manual, you’ll discover detailed instructions on advanced settings, troubleshooting tips, and explanations of less commonly used features. It’s a valuable resource for both beginners and experienced users looking to maximize the capabilities of their AKASO Brave 4. Keep a copy of the PDF manual readily available on your smartphone, tablet, or computer for quick access whenever you need it. It complements the AI assistant and provides a thorough understanding of your camera.
Utilizing the AI Assistant for Quick Answers
Need instant help with your AKASO Brave 4? The AI assistant is your go-to resource for quick and convenient answers to common questions. This intelligent tool is designed to provide immediate solutions and guidance, saving you time and effort in navigating the camera’s features and settings. The AI assistant can be accessed through the AKASO website or app, offering a user-friendly interface for asking questions.
Simply type your query into the chat window, and the AI assistant will provide relevant information and step-by-step instructions. Whether you’re wondering how to format your microSD card, connect to Wi-Fi, or use a specific shooting mode, the AI assistant is ready to assist. It draws from a comprehensive knowledge base, ensuring accurate and up-to-date information.
The AI assistant is particularly useful for troubleshooting common issues and understanding camera specifications. It can also guide you through the process of updating firmware and customizing camera settings. While the complete PDF user manual offers in-depth information, the AI assistant provides a quick and efficient way to find answers on the fly. Take advantage of this valuable tool to enhance your AKASO Brave 4 experience and get the most out of your action camera.